Testing Web Authentication (WebAuthn)
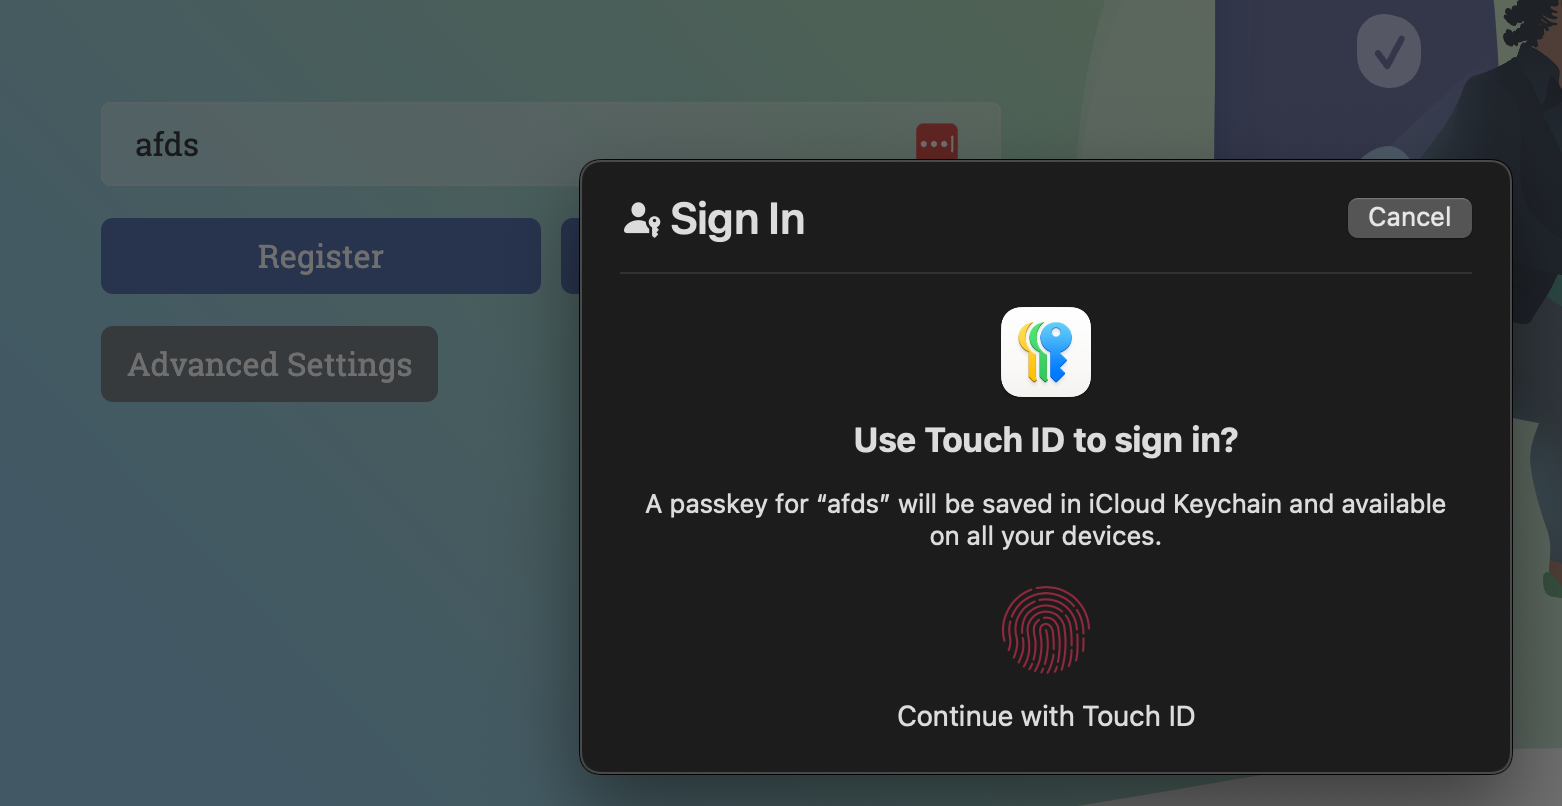
This modal is getting more and more common on the web:
 When you see it, you are about to use WebAuthn to authenticate yourself. Under the hood, the operating system will use the fingerprint
sensor to access a private key stored on the device.
When you see it, you are about to use WebAuthn to authenticate yourself. Under the hood, the operating system will use the fingerprint
sensor to access a private key stored on the device.
Web Authentication (WebAuthn) is a standard used to authenticate users on web applications. It relies on public-key cryptography to authenticate users and is supported by most modern browsers.
Because of its versatility, WebAuthn is a very good way to secure a web application. Companies like Google and Apple have built great user experiences around it. For instance, someone who owns a MacBook and an iPhone can use Face ID on their phone to authenticate on a website on their laptop.
WebAuthn is used during login processes, as the main authentication method or as a second factor. It is also often used to re-authenticate users when they want to access sensitive data or perform critical actions. For instance, your bank might be asking you to confirm your identity when you want to transfer money to a new account.
There are a lot of ways to authenticate using WebAuthn (hardware security keys, biometric-based authentication, etc.). So in the context of end-to-end testing, is it necessary to test them all one by one?
In this article, we will first explain how WebAuthn works and what the different available options are. Then, we will explore how to test WebAuthn in a web application. We will discuss what to test, how to test it manually and how to test it with automated tests.
How does WebAuthn work?
WebAuthn has two main operations:
- registration
- authentication
Registration happens when a user connects to a website for the first time. The user's device will be asked to generate a private and a public key. The device is in charge of keeping the private key secret and to only use it when the appropriate action from the user is performed. For instance, an iPhone will not allow accessing the private key it stores without a proper Face ID validation.
Private key, public key and signature tl;dr
Think of a private key like your secret password that only you should know.
The public key is like your public address or username—anyone can see it, and it’s safe to share.
When you sign something (a message or transaction), you use your private key to create a special digital stamp.
People can check this stamp with your public key to confirm it’s really from you.
This signature proves authenticity and that no one has changed the message.
The flow for registration is the following:
In this flow, the private key is kept secret, the server only knows about the public one. There is also an "attestation" object, giving details about the device that has been used for registration. It contains signed entries that can be checked against known trusted sources. For instance, in the case of an iPhone Face ID registration, it will contain a certificate signed by Apple that the server can validate. A lot of servers will not place any requirements on the attestation and allow "self" attestations, meaning it is not checked against a trusted authority.
In this flow, the server already knows the client's public key. It just has to send a challenge that the user signs with their private key. The challenge is just a simple random string.
Now that we know the high-level concepts of WebAuthn, let's take a look at the implementation in the browser.
We have explained that credentials are stored on devices or managed by operating systems. But there are convenient web APIs to interact with them!
First, before trying to register or authenticate using WebAuthn, the JavaScript can check if the current browser and device actually support it.
const canUseWebAuthn = await PublicKeyCredential.isUserVerifyingPlatformAuthenticatorAvailable()
The method PublicKeyCredential.isUserVerifyingPlatformAuthenticatorAvailable
will return true if the current device has a built-in authenticator. Some website will use that to decide if WebAuthn
can be used or not, so as a tester, you might need to override this method in automated tests.
If this call returns false, the user can still login with WebAuthn, using another device, for instance, by scanning
a QR code with their phone. (thanks a lot to Nina Satragno for
clarifying this point).
Then, the JavaScript calls the navigator.credentials.create or the navigator.credentials.get methods to register or
authenticate using the messages it received from the server. The protocol to exchange messages between the server and
the browser are not specified. In most cases, it will be HTTPS and JSON messages.
If you want to go further on implementation, here is a very good MDN article describing the full flow in JavaScript.
There are a few more key concepts we need to clarify before going to the next part:
Authenticator
An authenticator is the hardware or software component that creates and stores the user’s private key—this can be a built-in platform authenticator (on computers or mobile phones), or a roaming external device like a YubiKey. It handles user verification (e.g., biometrics or PIN) and generates signatures on behalf of the user.
Authenticator Protocol The authenticator protocol refers to how the authenticator communicates with the client and can be “U2F” or “CTAP2.” While this information may be provided during registration, servers should treat it only as advisory and avoid relying on it for critical security decisions.
Authenticator Transport The authenticator transport indicates how the authenticator connects to the client—possible values include “usb,” “nfc,” “ble,” “cable,” and “internal.” As with the protocol, these values are more of a hint than a guaranteed truth, so servers should not make strict security decisions based on them.
WebAuthn Testing plan
Now we understand WebAuthn enough to ask the following questions:
- What should I cover when testing WebAuthn?
- How to login using WebAuthn when I write an automated test?
The answer to the second question will be provided in the part about "Automated Testing of WebAuthn". Here, we will focus on what to test.
The traits of the authenticator (its protocol and value) are only informative: applications should not be used by the server to allow certain Authenticators. This is something we want to test: in the test plan, we will cover at least two different setups for out authenticators.
So, we need to evaluate the scope of testing:
- Does the application accept self attestations?
- Does the application accept connections from devices or browsers that don't support WebAuthn?
Now here is our plan!
Everything works
- register a new user using WebAuthn
- login using WebAuthn and the same authenticator as during registration
Registration fails
- register a new user using WebAuthn but the authenticator fails to generate a key pair
- check that the registration has failed and that the account is not created
This scenario can be declined based on why the authenticator failed to sign the challenge:
- Hardware/software failure
- User cancels the operation
Hardware/software failures are usually hard to test. They can be tested at a later time.
Login fails
- register a new user using WebAuthn
- login using WebAuthn but the authenticator fails to sign the challenge
This scenario can be declined based on why the authenticator failed to sign the challenge:
- Hardware/software failure
- User cancels the operation
- The signature is invalid
Hardware/software failures are usually hard to test. They can be tested at a later time.
Browser does not support WebAuthn
- try to signup on a browser that does not support WebAuthn
- depending on the requirements, the user should be redirected to another authentication method or prevented from registering
Self attestation is not allowed
- register a new user using WebAuthn but the authenticator does not provide a trusted attestation
- check that the registration has failed and that the account is not created
Now, let's see how to test all of this!
Manual Testing of WebAuthn
Using real devices
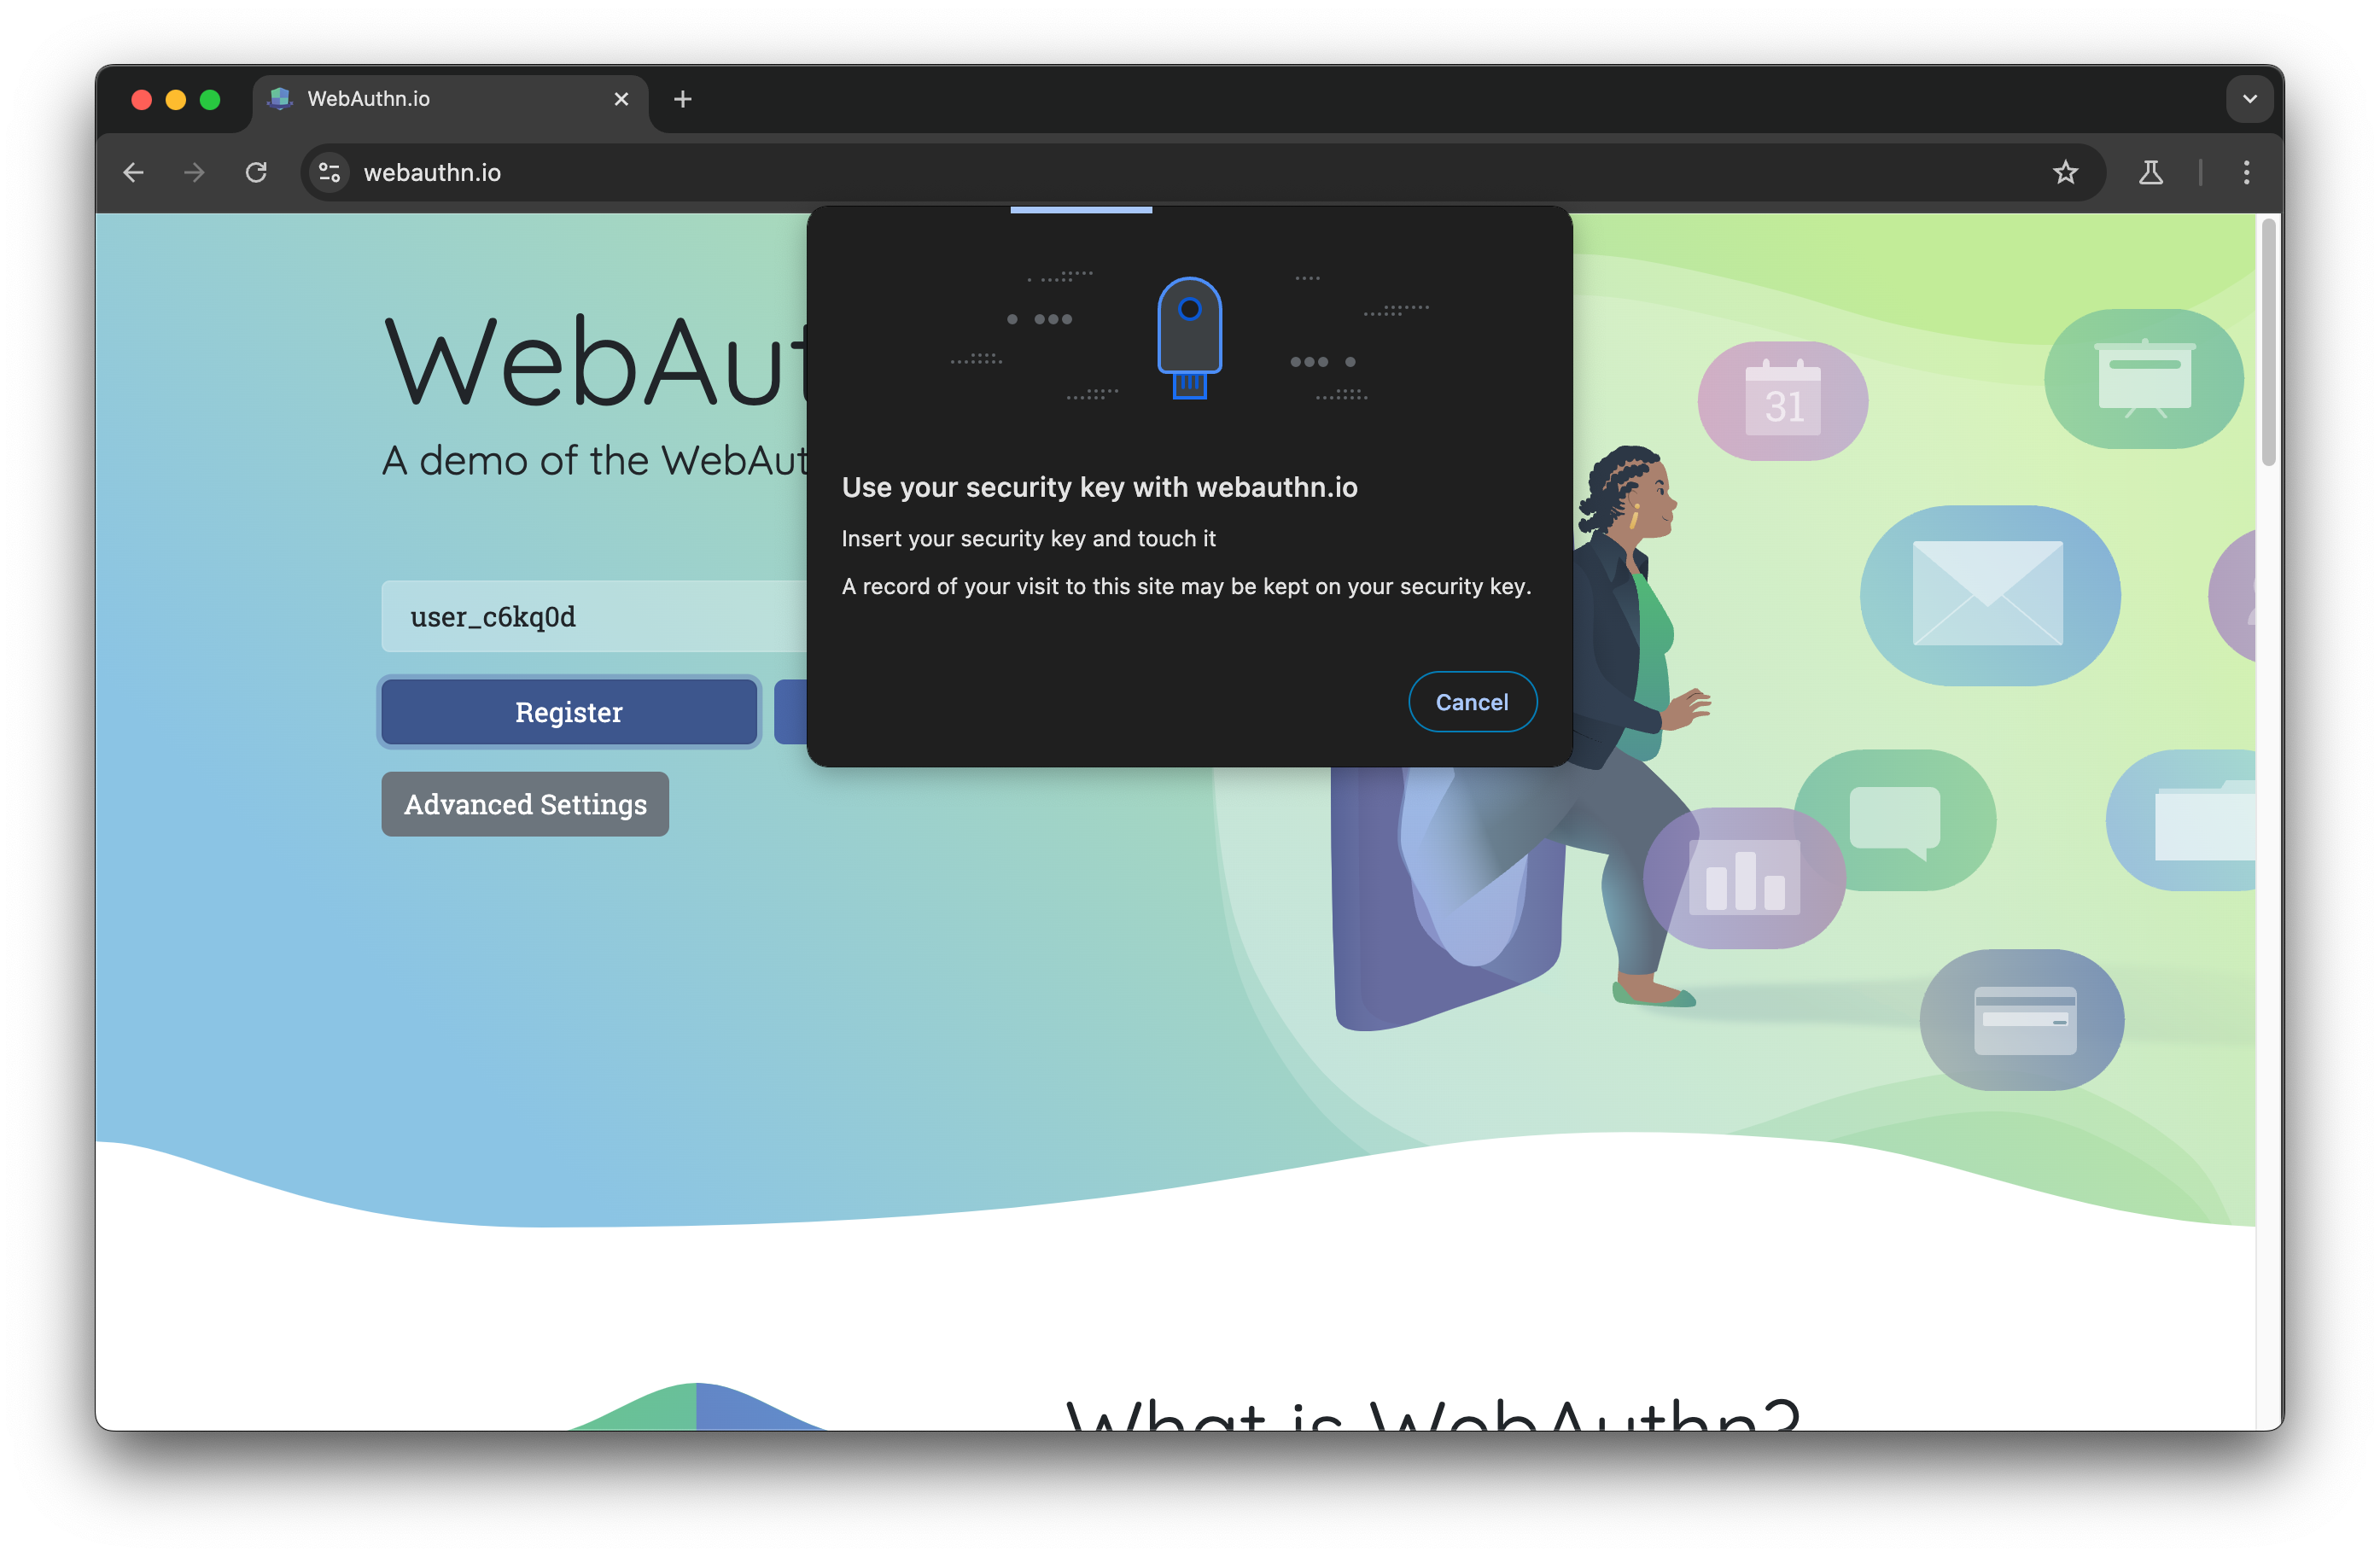
- Got to https://webauthn.io/
- enter a username and click "Register"
Now, depending on your device, you will be prompted with one of the following:
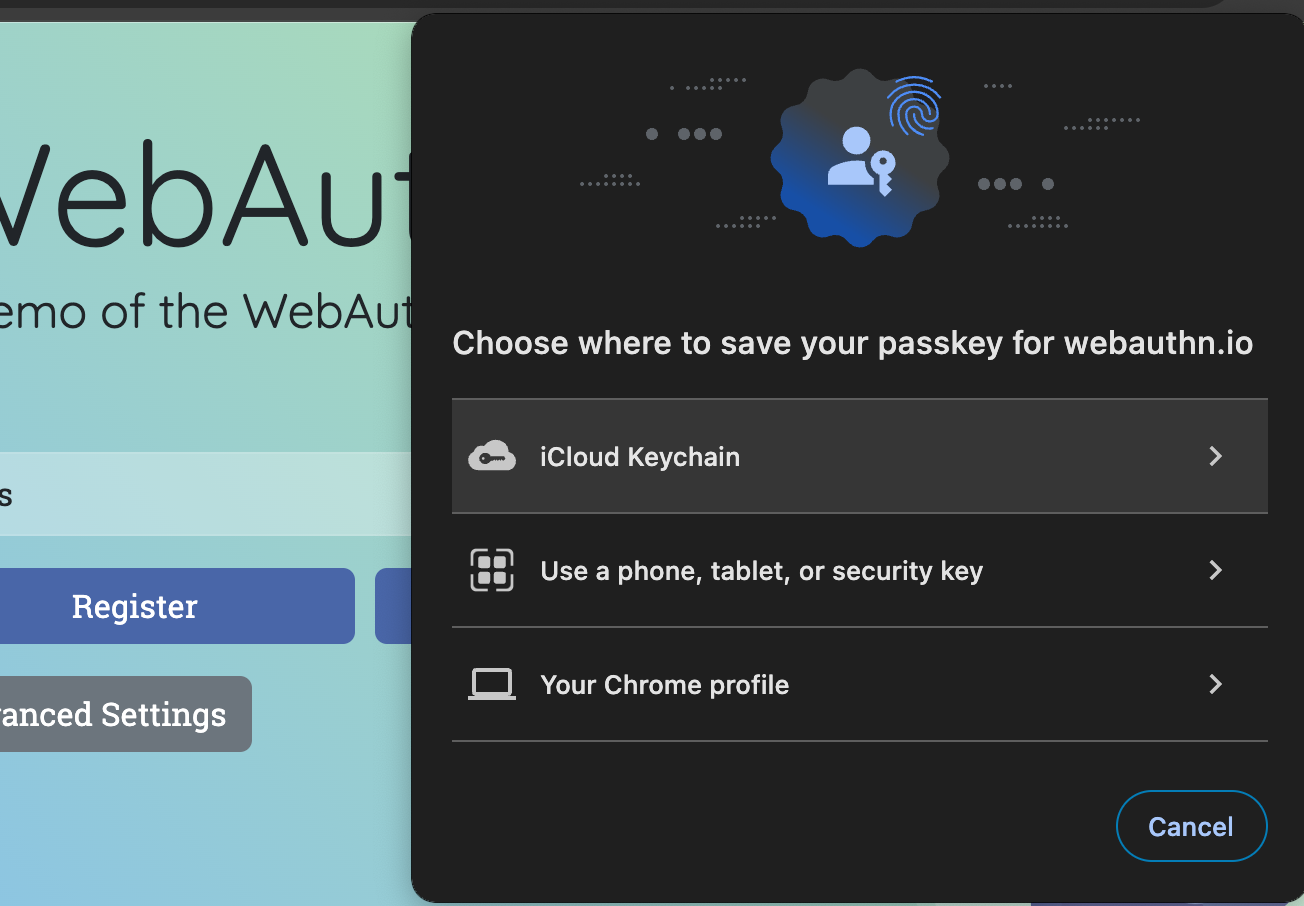
From the fingerprint modal, clicking "cancel" will open the chooser modal.
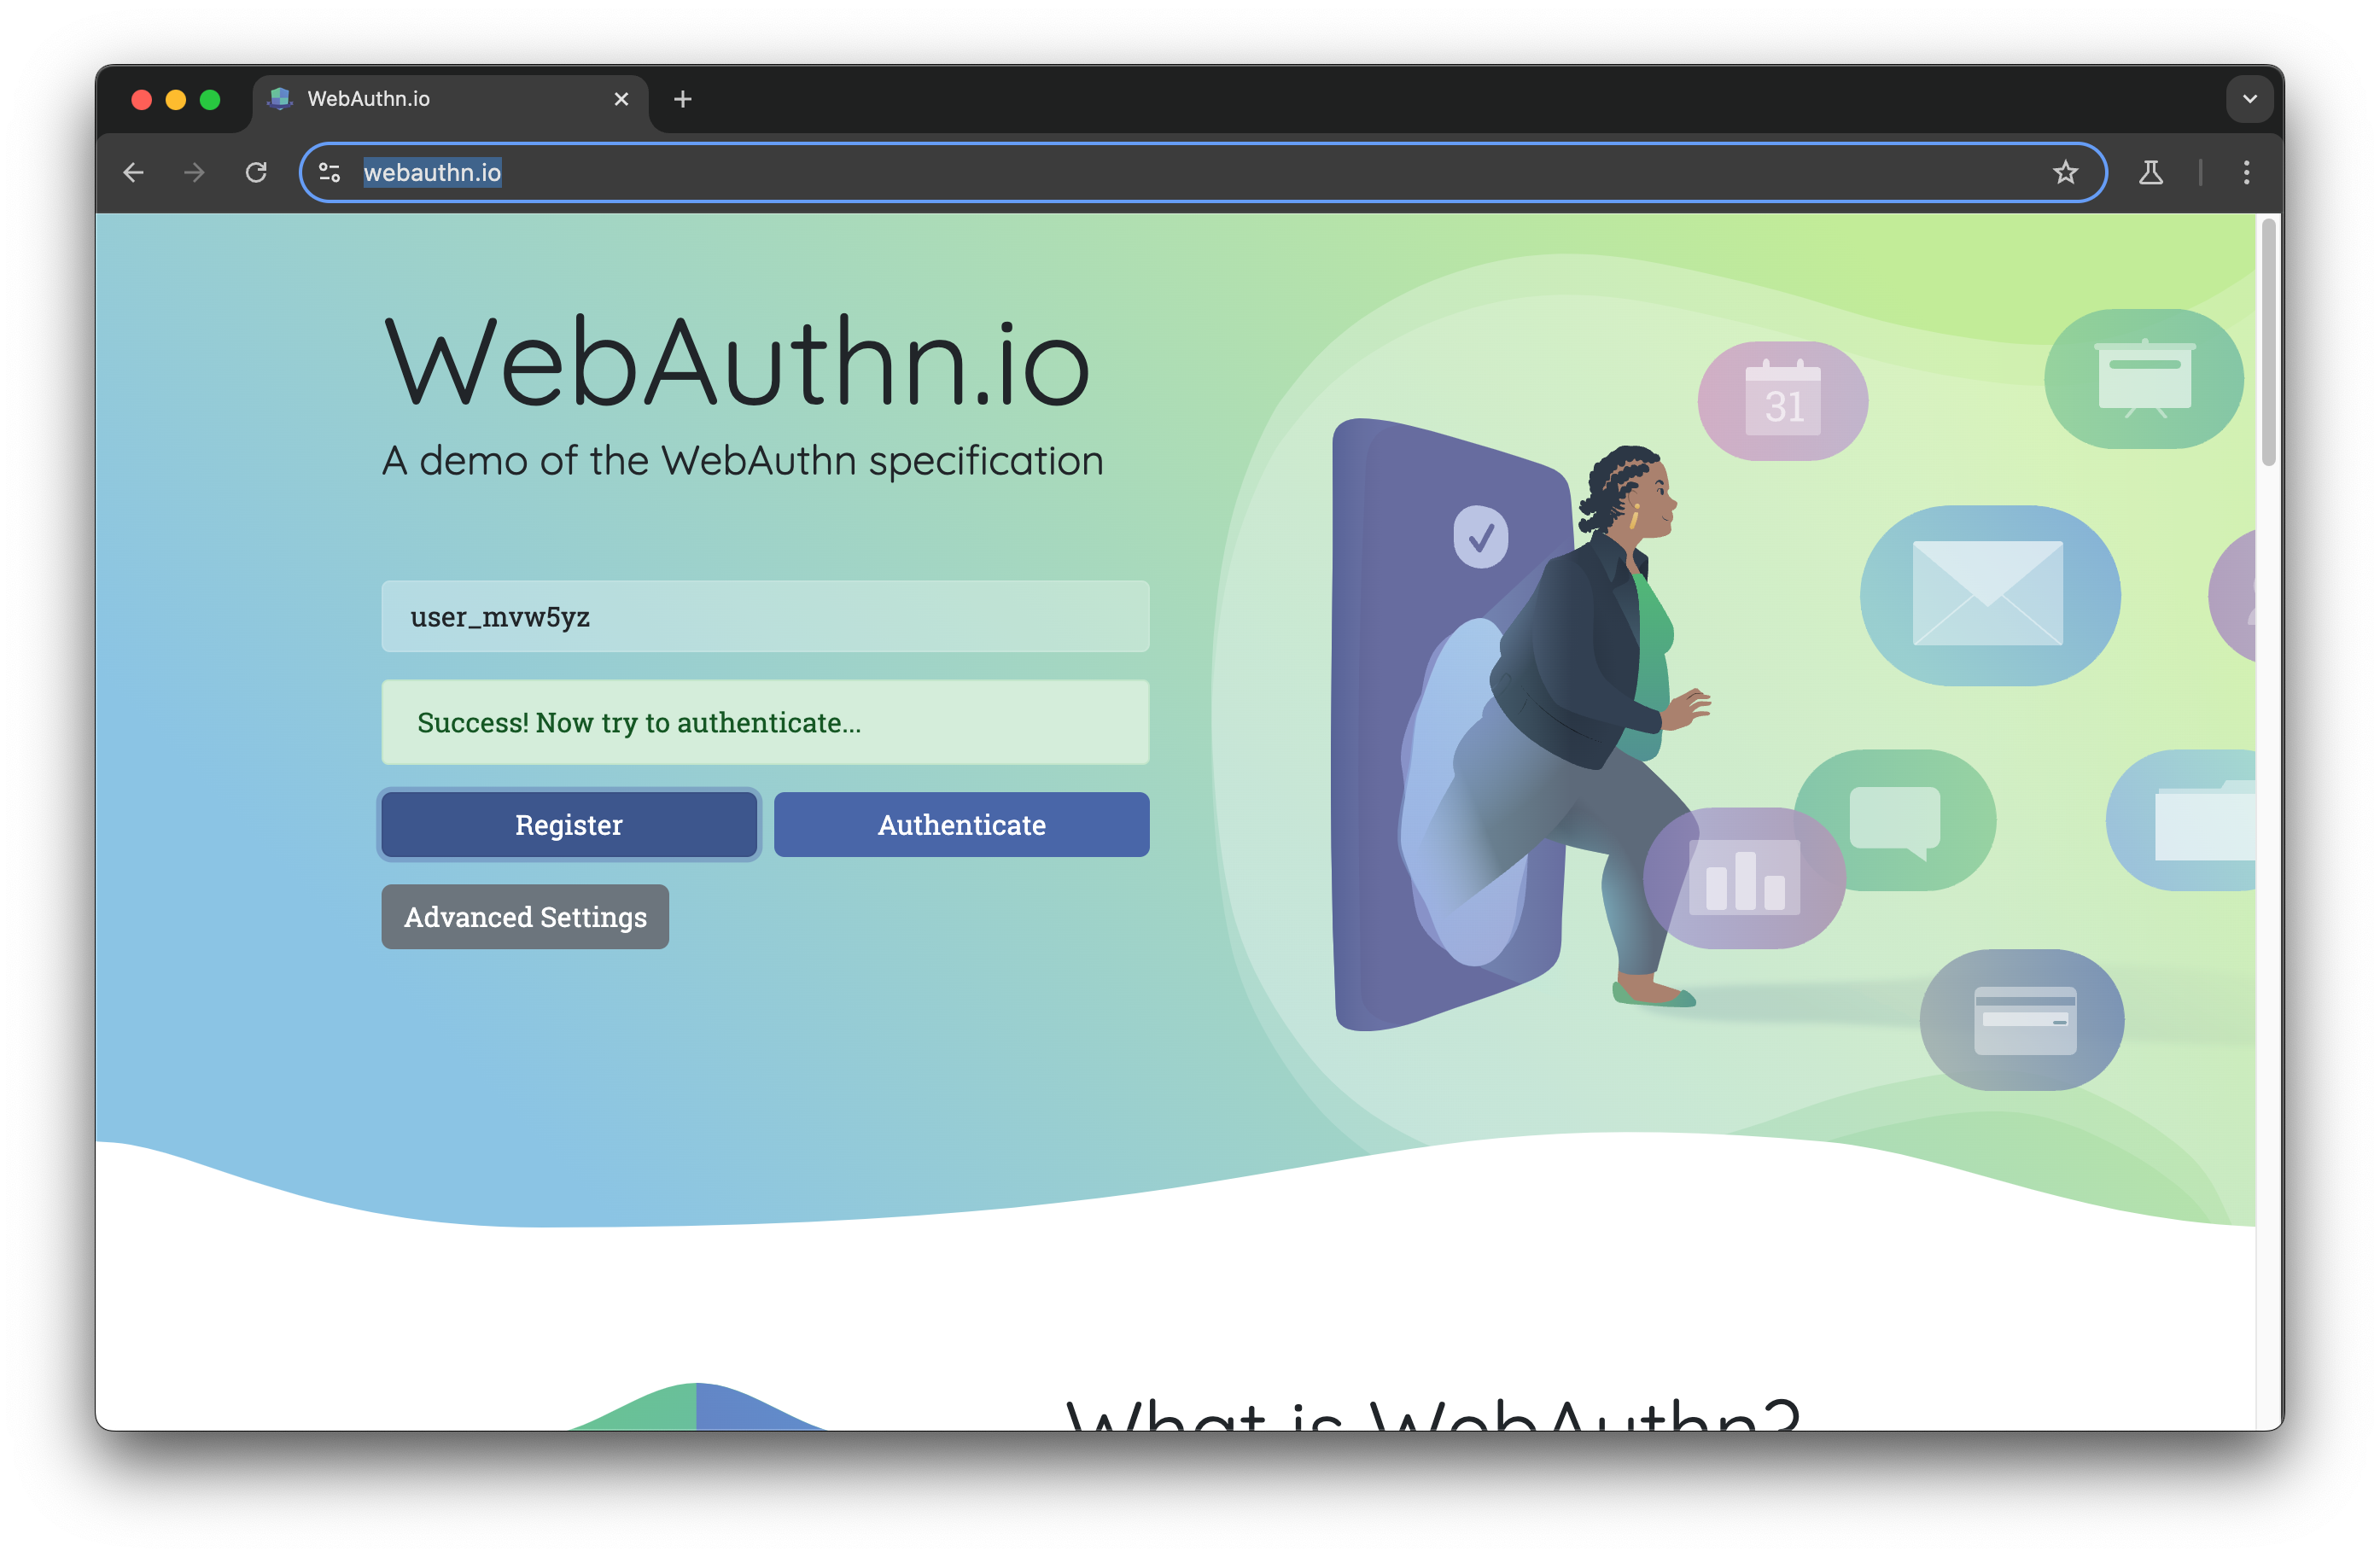
- complete the registration using the authenticator of your choice.
- Click "Authenticate"
- when prompted, use the same authenticator as during registration
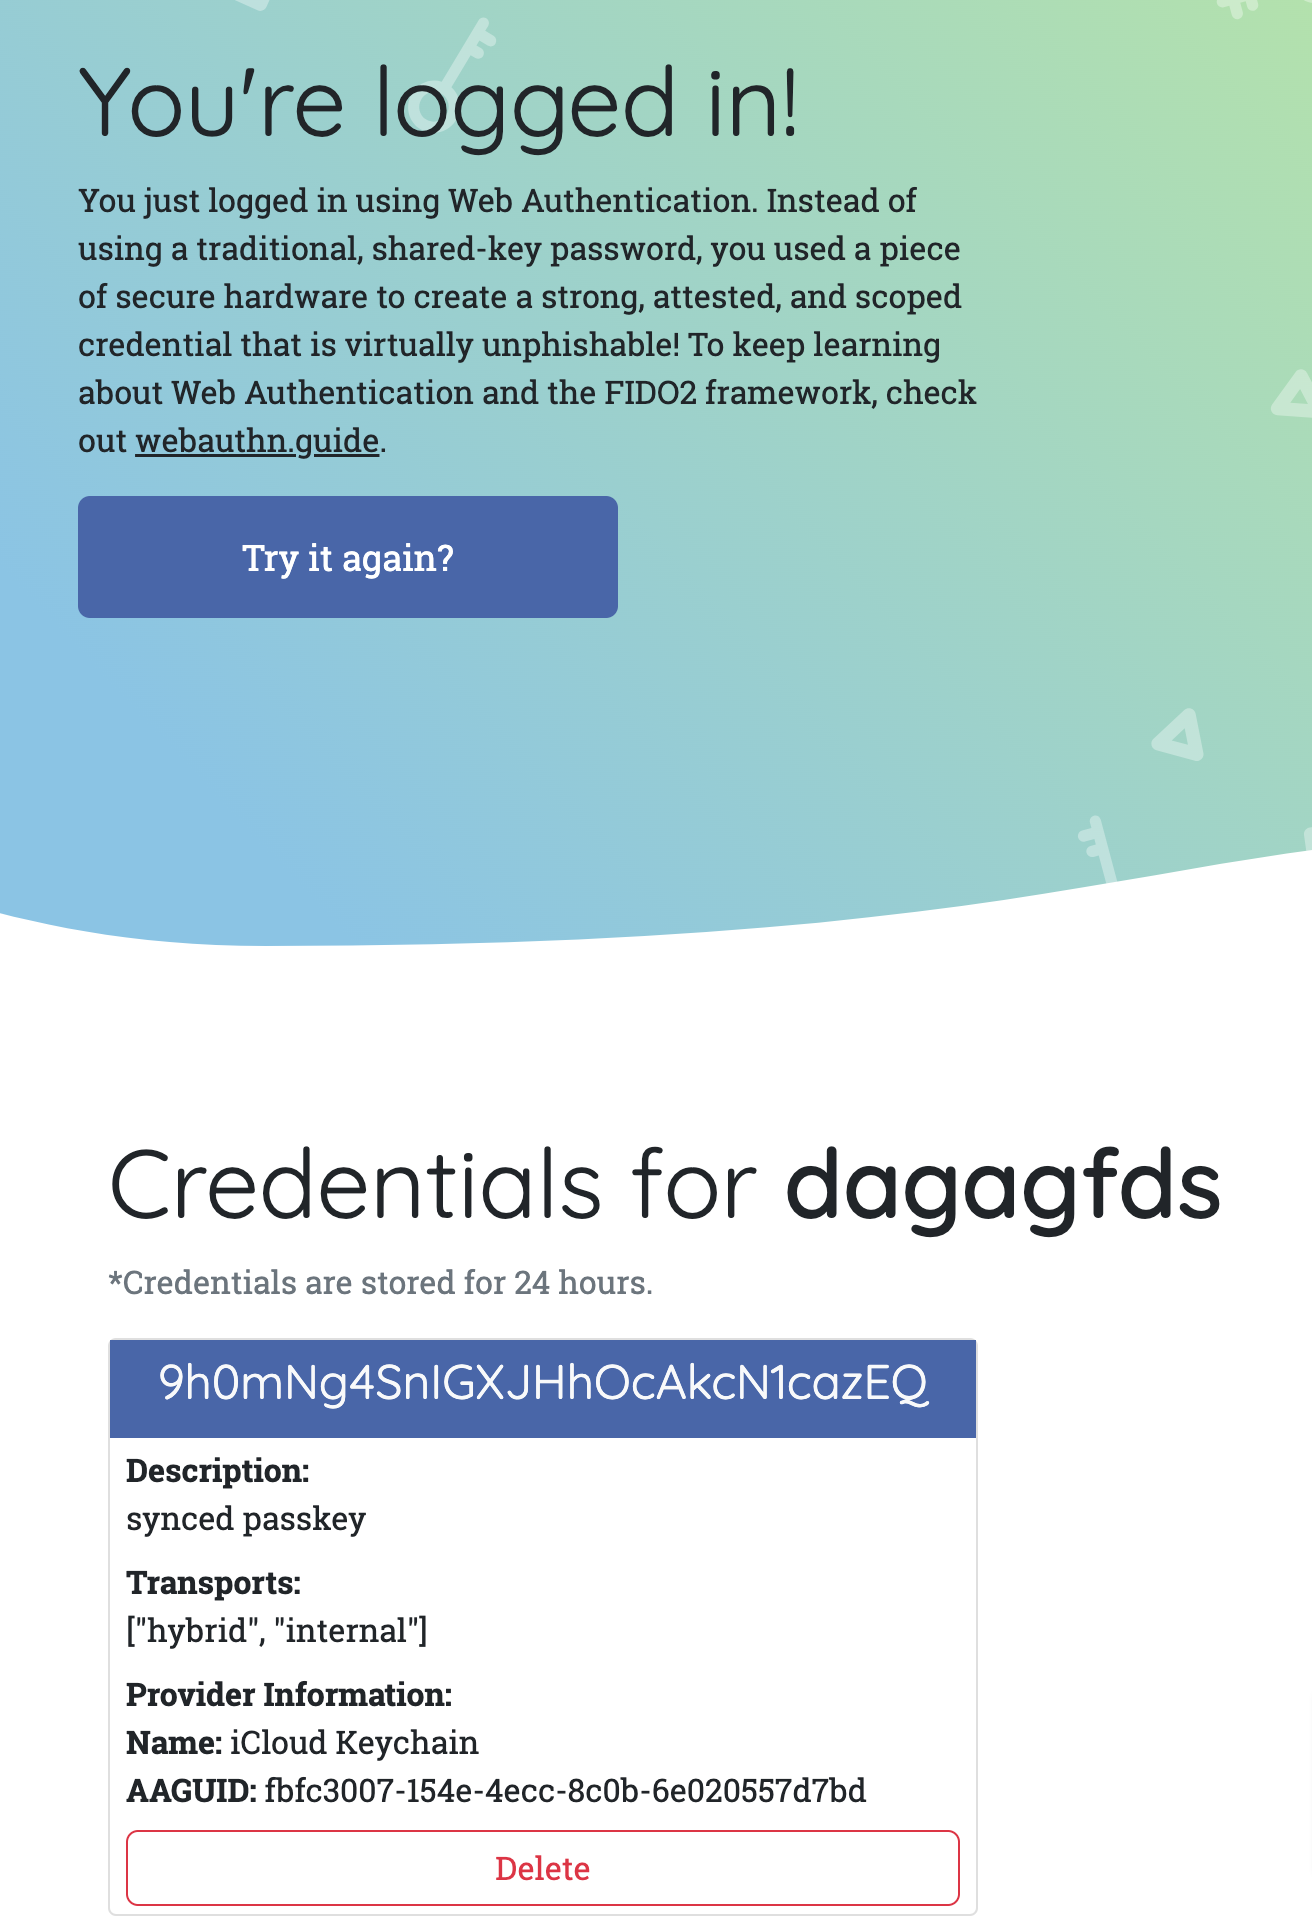
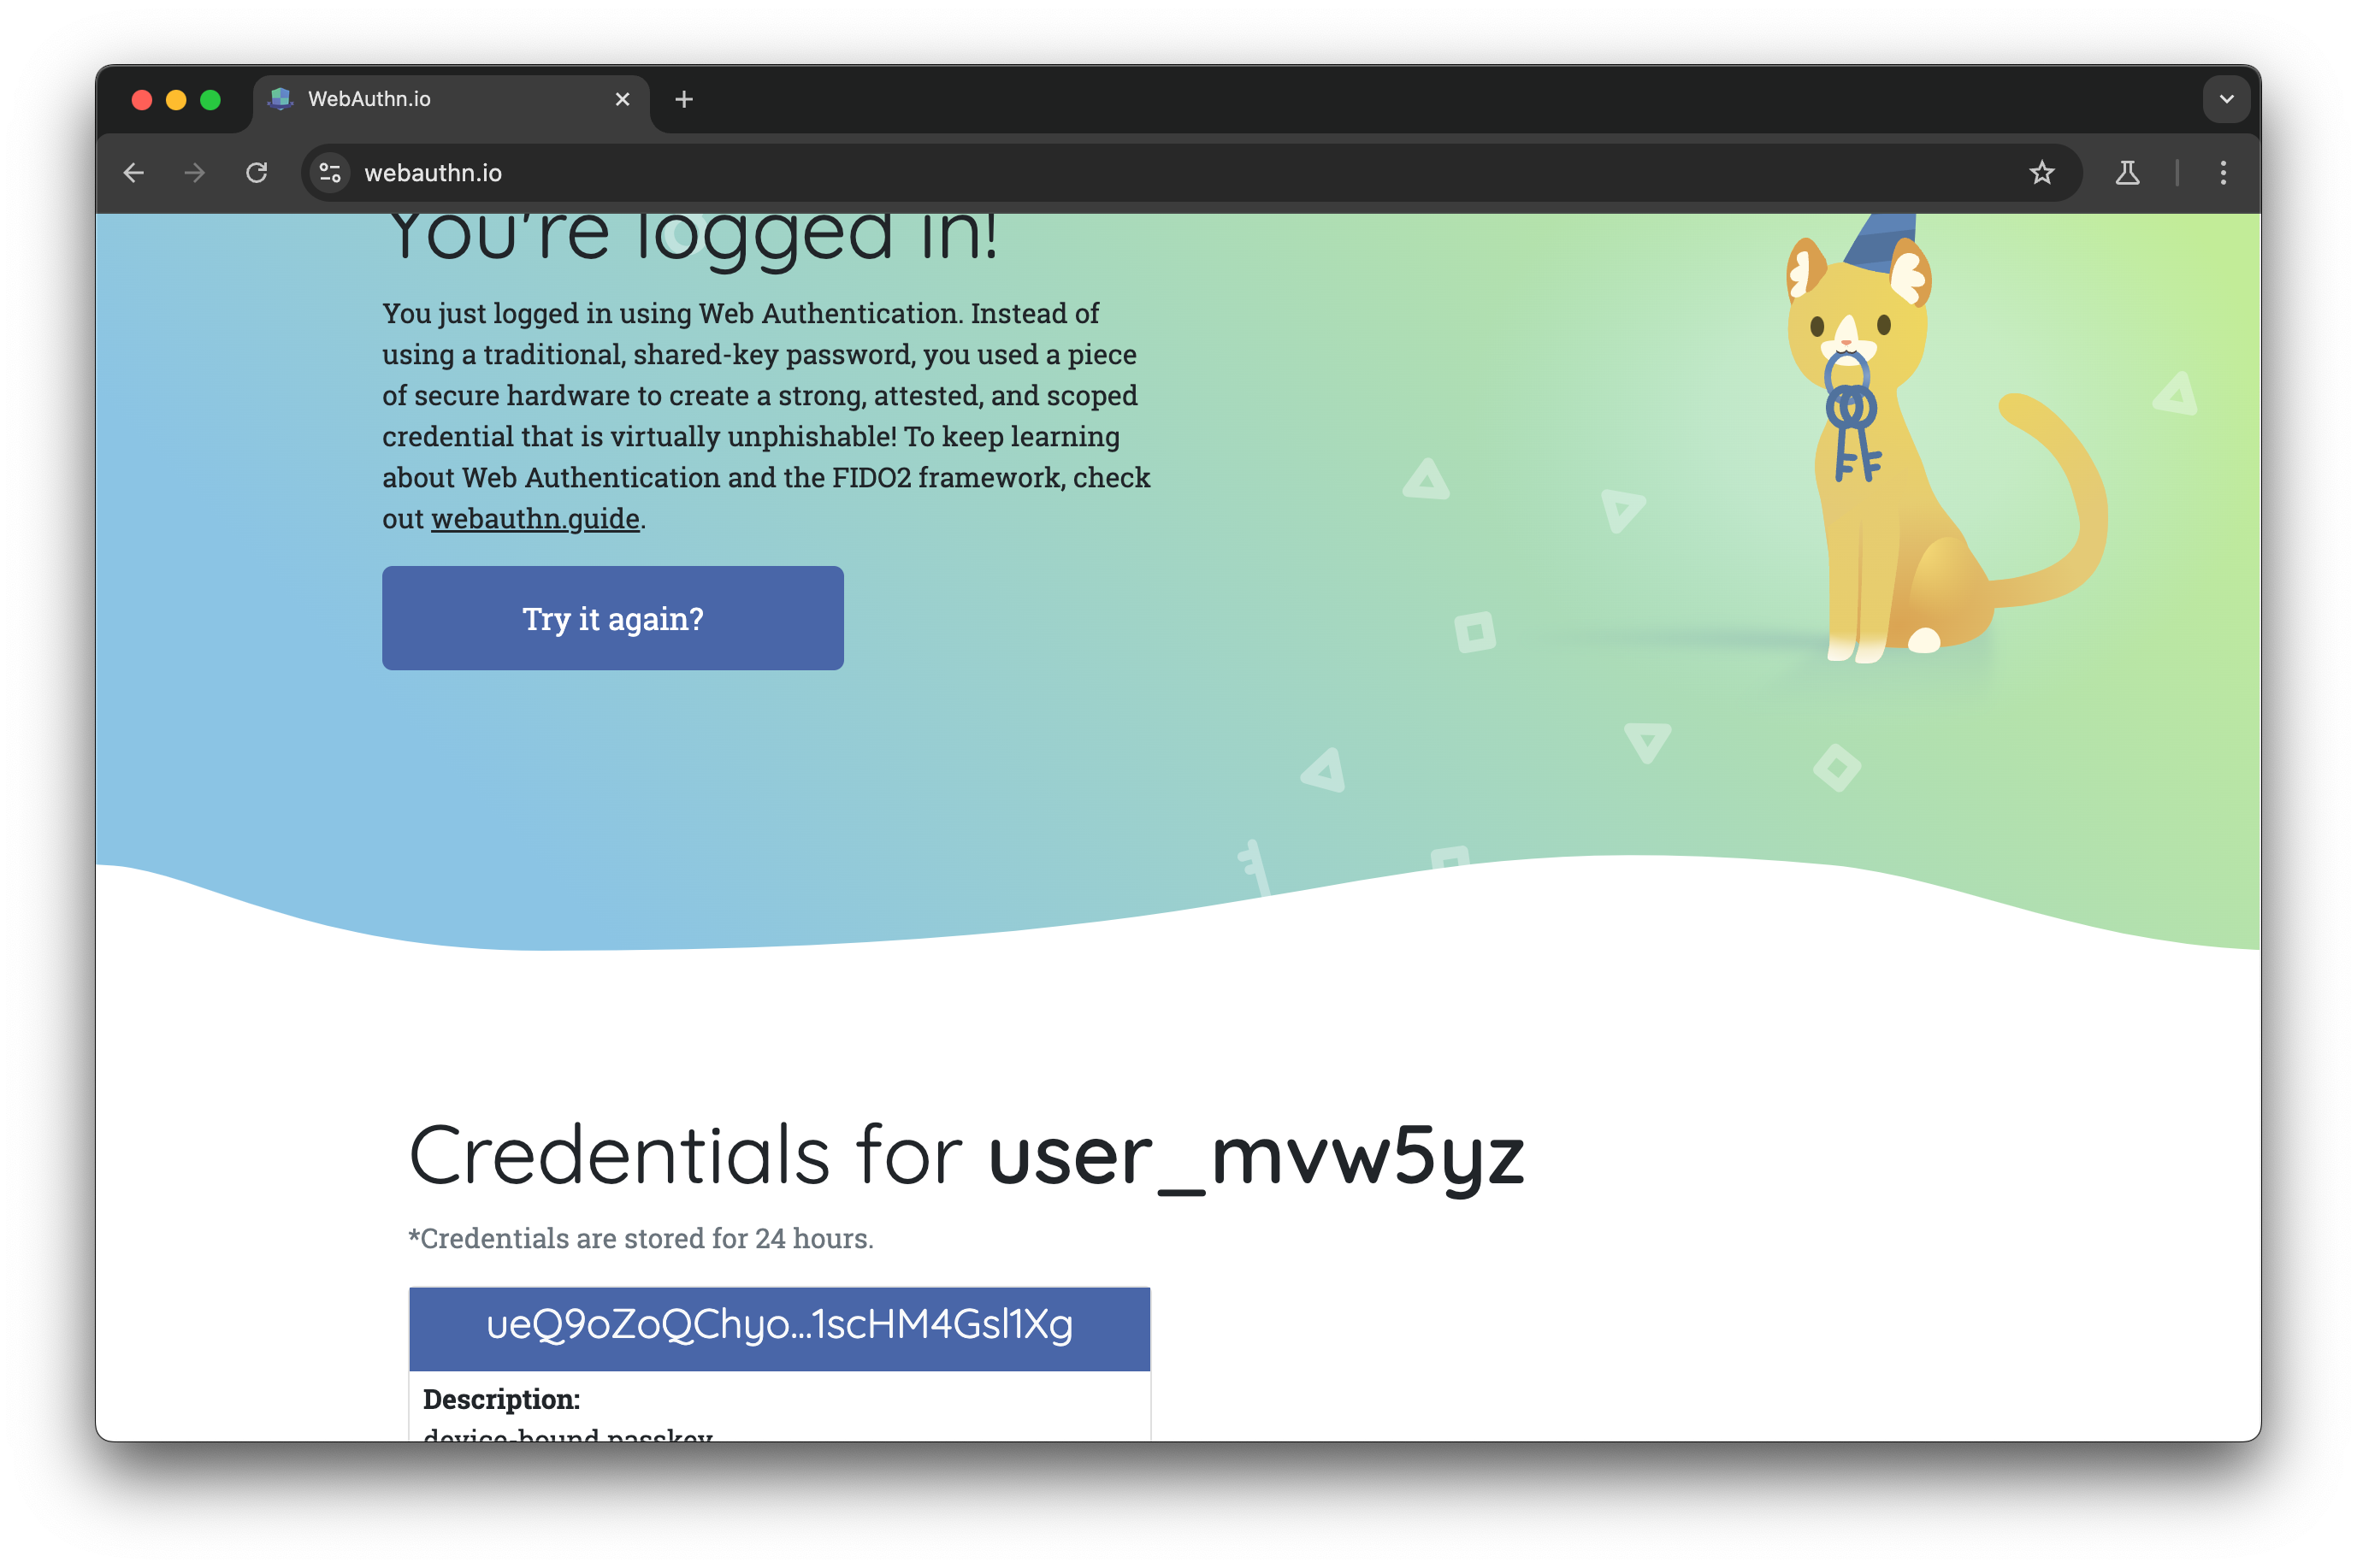
You should be logged in!
You can iterate on this scenario by changing the authenticator (read, use a wrong device), cancelling the operation, etc.
Using the Chrome Developer Tools
The Chrome developer tools provide a very handy way to emulate authenticators. First you need to open the WebAuthn panel. In my case, I have to click on the three dots menu at the top right of the developer tools to open the "More tools" menu. Then, I click on "WebAuthn".
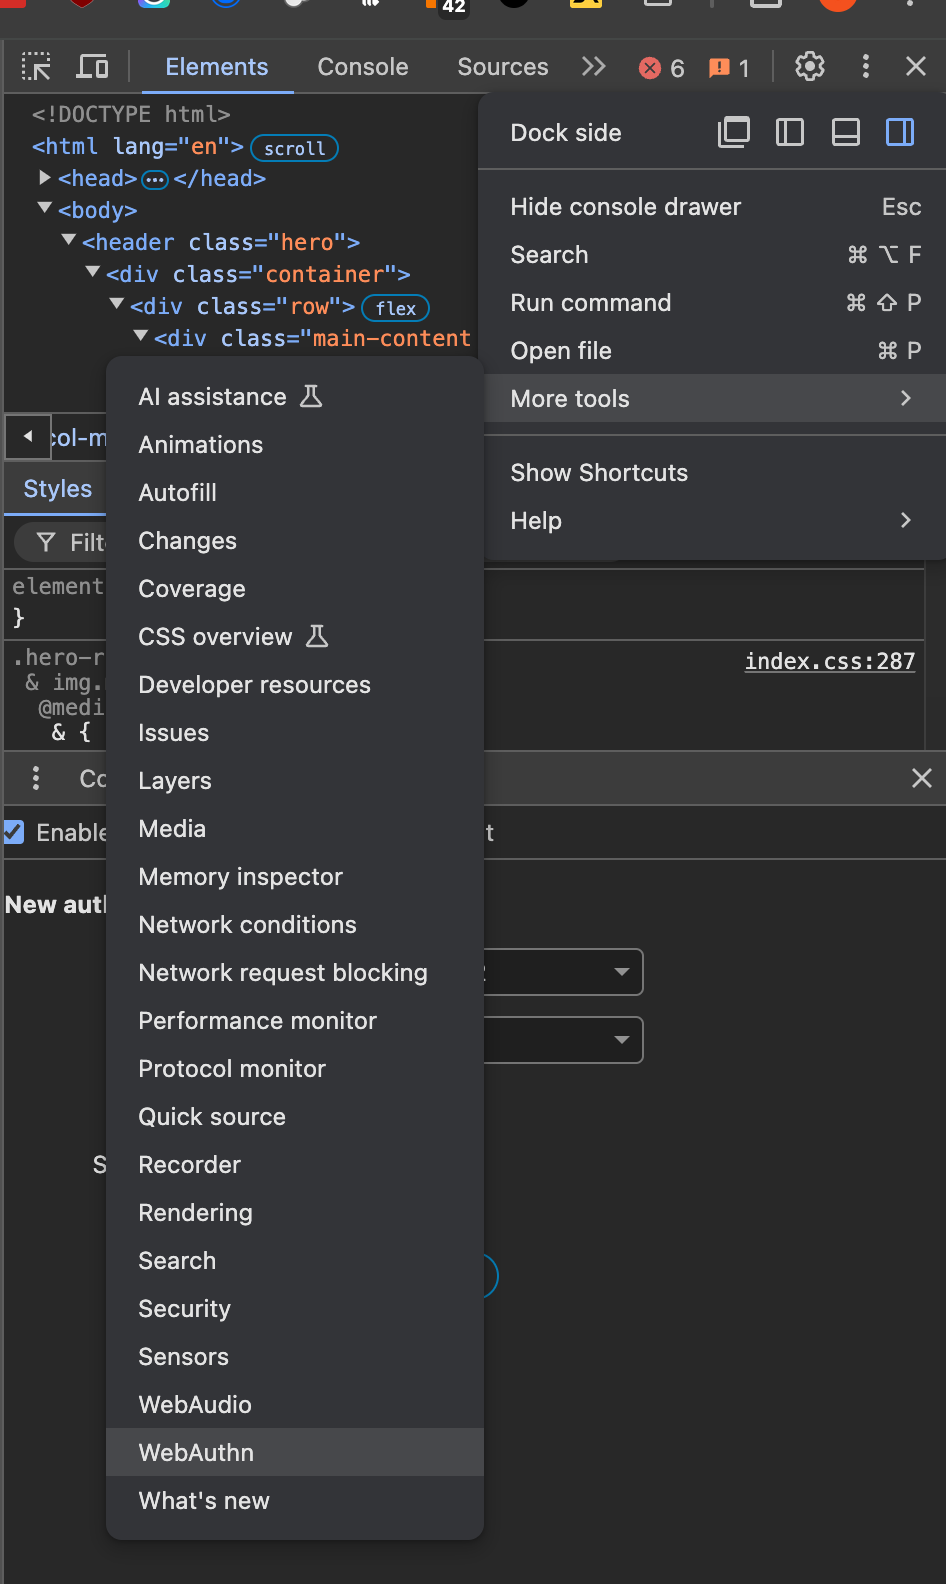
Don't forget to tick "Enable virtual authenticators environments" in the new panel.
Then, using the new panel, create a new authenticator using the options:
- Protocol: ctap2
- transport: usb
Do not tick the extra checkboxes and click "Add"

You should see a new authenticator in the list.

Now enter a new username and click "register". You will see some modals open and close very quickly but more importantly, you will see a new credential added to our authenticator.
Now, clicking "Authenticate", will log you in using this authenticator.
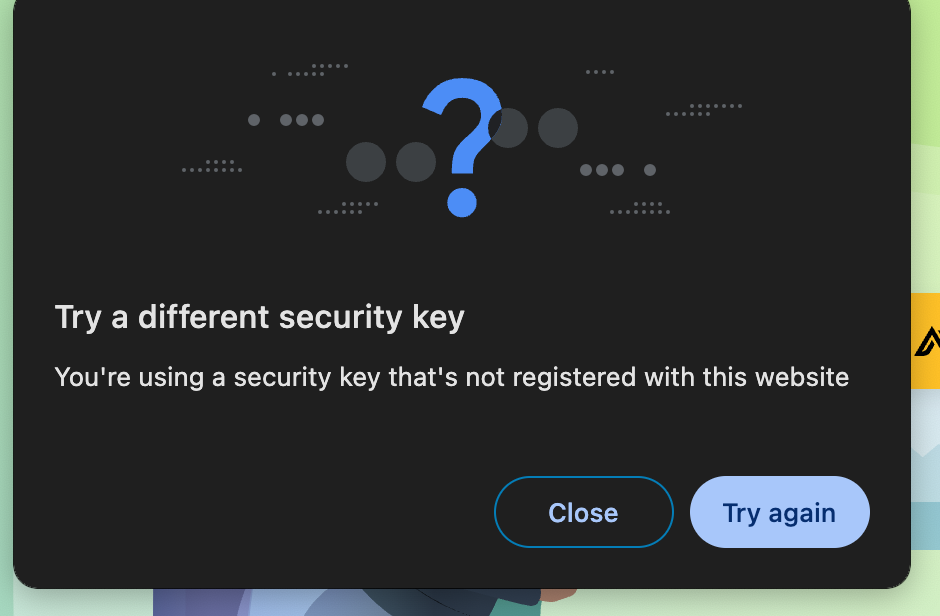
To test broken flows, you can create a new authenticator and set it as the active one! The Chrome developer tools only allow one virtual authenticator to be active at any time!
Here is what happens when you use a different authenticator:
Automated Testing of WebAuthn
In this part, we will see how to create a virtual authenticator using Playwright and the Chrome DevTools Protocol.
The Chrome DevTools Protocol is a protocol used to control Chromium-based browser remotely and access internal features. If you are interested in an article or a talk on how it can be leveraged to test web applications, please let me know!
We assume we have playwright installed and working locally.
Let's see what happens with a simple script trying to register on https://webauthn.io/.
import { chromium } from 'playwright';

const browser = await chromium.launch({ headless: false });

const context = await browser.newContext();

const page = await context.newPage();
await page.goto('https://webauthn.io/');

const randomString = Math.random().toString(36).substring(7);

await page.getByPlaceholder('example_username').fill(`user_${randomString}`);
await page.getByText('Register', { exact: true }).and(page.locator('button')).click();
We are asked to use a key and the test hangs: this is not ideal.
Let's dynamically add a virtual authenticator!
This website does not check PublicKeyCredential.isUserVerifyingPlatformAuthenticatorAvailable.
Some others, like https://passkeys.eu/#signup-init, do. In that case, you might need to add
await context.addInitScript(() => {
    PublicKeyCredential.isUserVerifyingPlatformAuthenticatorAvailable = async function() {
        return true; // Force "yes, available"
    };
});
to your script to force the browser to say it supports WebAuthn.
Now, to add a virtual authenticator, we need to use the Chrome DevTools Protocol.
const CDPSession = await page.context().newCDPSession(page);
await CDPSession.send('WebAuthn.enable');
And as we did with the Chrome DevTools, we can create a new authenticator.
await CDPSession.send('WebAuthn.addVirtualAuthenticator', {
    options: {
        protocol: 'ctap2',
        transport: 'usb',
        hasResidentKey: false,
        hasUserVerification: false,
        isUserVerified: false
    },
});
As you can see, there are the same options as in the Chrome DevTools.
Now, our full script looks like:
import { chromium } from 'playwright';

const browser = await chromium.launch({ headless: false });

const context = await browser.newContext();

const page = await context.newPage();


const CDPSession = await page.context().newCDPSession(page);
await CDPSession.send('WebAuthn.enable');

await CDPSession.send('WebAuthn.addVirtualAuthenticator', {
    options: {
        protocol: 'ctap2',
        transport: 'internal',
        hasResidentKey: true,
        hasUserVerification: true,
        isUserVerified: true
    },
});

await page.goto('https://webauthn.io/');

const randomString = Math.random().toString(36).substring(7);

// 3. Interact with the page as usual
await page.getByPlaceholder('example_username').fill(`user_${randomString}`);
await page.getByText('Register', { exact: true }).and(page.locator('button')).click();
And running it shows:
We can even add a click on "Authenticate" to test the login flow!
We have tested WebAuthn using Playwright!
If you want examples on how to test the other scenarios using Playwright, please let me know!
Conclusion
I hope you enjoyed this article. Feel free to contact me if you have any questions (on BlueSky or X)!
There is one last way to test WebAuthn: that I have not covered in this article: Using Heal.dev!
Heal.dev is the best way to test complex web applications using AI. Heal.dev tests are hosted in the cloud and do not have any flake (really!). AI writes and fix tests for you and writing a test case is as simple as sending a slack message (really! (again)). I know it sounds too good to be true, so only one way to know: try it!
If you want to know more, book a meeting with me!